

why homemade
- You can control the quality of the ingredients (using organic or pasture-raised bones).
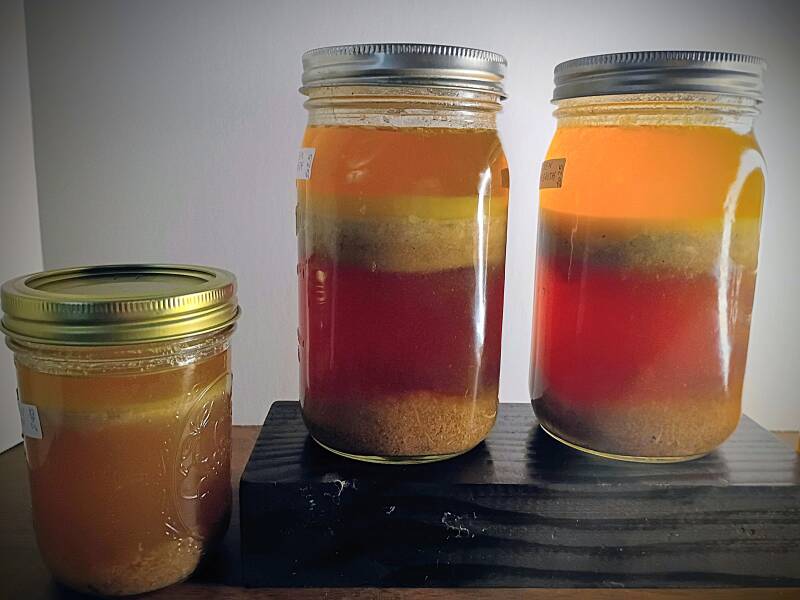
- Store bought lacks the nutritional depth and flavor richness which you can clearly see when you look at the richness of a homemade broth next to a store bought one.
- You control the simmering time (often 12-24 hours) to maximize nutrient extraction.
- You can manage the sodium content, which can be very high in some commercial products.
- You can also keep it very basic or add other ingredients and spices to fit your specific dietary needs or preferences.
Health Benefits

Homemade from start to finish
If you don't raise your own chickens, find sources that are not polluting their meat with hormones and antibiotics.
In this blog you will learn the long process of how to get a quality that only comes with the time given to create a wholesome goodness to nourish your bodies!
More Than Just Soup
For centuries, grandmothers and traditional healers have praised and depended on the soothing, restorative power of slow-simmered bone broth. While it might sound trendy today, this "liquid gold" is a nutritional powerhouse that modern science is starting to catch up with.
So... If you’re tossing out chicken bones after dinner, you’re missing out on a treasure trove of nutrients! Homemade chicken bone broth is incredibly easy to make and offers a host of potential benefits, from healing your gut to making your joints feel brand new.
Here’s a deep dive into the top health benefits you can sip on:
1. The Ultimate Joint Support
When you simmer bones for 12+ hours, the connective tissues break down into a substance called gelatin. Gelatin is essentially cooked collagen—the most abundant protein in the human body, vital for the structure of our joints, tendons, and ligaments.
- Natural Glucosamine & Chondroitin: Bone broth is a natural source of glucosamine and chondroitin, compounds commonly sold as expensive supplements to help manage arthritis pain and reduce inflammation in the joints.
- Amino Acid Building Blocks: The gelatin provides critical amino acids like proline and glycine, which your body uses to rebuild and repair its own connective tissue.
2. A Healer for Your Gut
Perhaps the most celebrated benefit of bone broth is its power to support digestive health. Think of it as a protective, soothing blanket for your intestinal lining.
- Sealing the Gut: The gelatin in the broth coats the mucosal lining of the digestive tract. This is believed to help "seal" the small openings in a condition often called "leaky gut" (intestinal permeability), improving nutrient absorption and reducing sensitivity.
- Gut-Friendly Glutamine: Bone broth is rich in the amino acid glutamine, which is essential fuel for the cells lining the small intestine. Adequate glutamine helps maintain the integrity of the intestinal wall, protecting against inflammation.
3. Beauty from the Inside Out (Skin, Hair, and Nails)
Since bone broth is packed with precursors to collagen, it naturally supports your body’s largest organ: your skin.
- Skin Elasticity: As we age, our natural collagen production declines, leading to wrinkles and sagging. Consuming collagen from bone broth may help improve skin elasticity and hydration, contributing to a more youthful appearance.
- Stronger Nails & Hair: The rich mineral content and amino acids provide the raw materials needed for stronger, less brittle nails and vibrant hair growth.
4. Sleep and Mood Booster
Feeling restless? Try a warm mug of broth before bed.
- The Power of Glycine: Bone broth is abundant in the amino acid glycine. Studies have shown that consuming glycine can have a calming effect on the nervous system, potentially improving sleep quality and duration. Better sleep naturally translates into better mental clarity and a more balanced mood during the day.
5. Hydration and Immune Support
Bone broth is a superior source of hydration compared to plain water, especially when you are feeling under the weather.
- Electrolyte Replenishment: The simmering process extracts electrolytes like potassium, sodium, and magnesium from the bones and vegetables. These are crucial for muscle function, nerve signaling, and maintaining proper fluid balance in the body.
- Mineral Density: While the overall mineral count can vary, bone broth provides trace minerals like calcium, phosphorus, and silicon that support bone health and immune function in an easily digestible form.
The Process

Part 1: Making the Bone Broth & Cooking the Meat
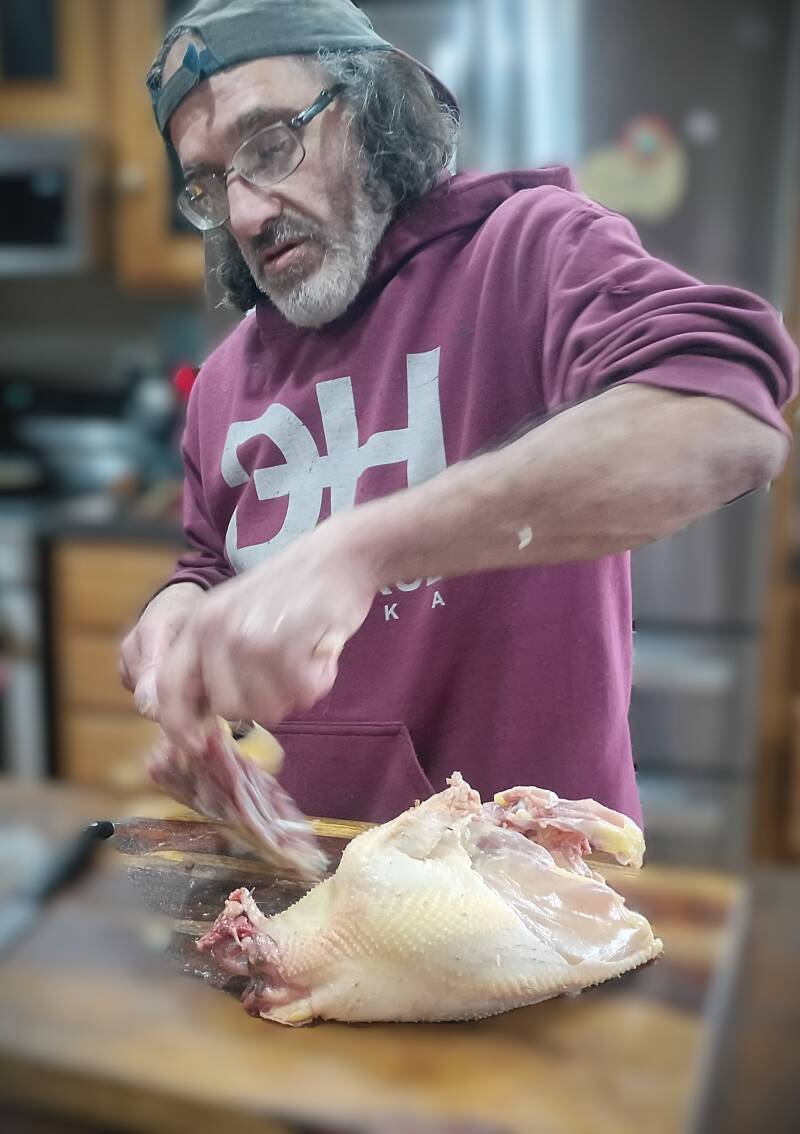
Gather Bones & Meat - Taking the life of a living being is never easy and not fun, however difficult it is I feel it is a deeply connecting part of how we nourish our bodies. We always make sure the animal is calmed and remember to give thanks for the life that is given. I also like to say some of the things i will be using it for. A completion of a life lived with purpose. The great circle of life. When we can go to the store to buy our food, it is easy to forget that a life was taken to support ours. In doing it myself, I know everything about the animal including how it was cared for. Knowing this brings an incredible depth to the idea of whole health and wellbeing. And a big shout out to my husband Jason and brother Mitch for all their help it made this big job less overwhelming!


Step 1: Preparation
- Gather Bones & Meat: Start with a whole chicken or bones/parts (carcass, necks, feet, wings) and meaty sections (legs, thighs, breasts). Ensure you have enough raw skin to render later.
- Chop/Smash (Optional but Recommended): Use a cleaver or a heavy knife to roughly chop the large bones (like the thigh or leg bones) to expose the marrow. This increases nutrient extraction.
- Roast (Optional): For a richer flavor and darker color, roast the bones, and any meaty parts (optional) in a preheated oven at 400°F (200°C) for 20-30 minutes until nicely browned.
- Vegetables & Aromatics: Chop up aromatics like carrots, celery, onion, garlic, and herbs (bay leaves, thyme).
Step 2: Simmering the Broth


This phase cooks both the bones for the broth and the meat for canning.
- Combine Ingredients: Place the roasted bones, meaty pieces, and aromatics into a very large stockpot. I like to sauté the meat and the skin with onions and garlic before adding to the pot for extra flavor.
- Add Water & Acid: Cover everything with cold water, ensuring the water level is a few inches above the contents. Add 1-2 tablespoons of apple cider vinegar (ACV). The ACV helps draw minerals out of the bones.
- Bring to a Boil: Bring the pot to a rapid boil, then immediately reduce the heat to a very low simmer.
- Skim the Scum: Over the first hour, use a ladle or spoon to carefully remove any foam or "scum" that rises to the surface. This keeps the final broth cleaner.
- Long Simmer: Simmer for a minimum of 12 hours up to 24 hours. Keep the heat low and steady. Note: Remove the meat for canning after 2-4 hours (or when fully cooked and fork-tender) so it doesn't get stringy. I usually put the broth in the refrigerator overnight and pick up the next day. this is where the time given is crucial to getting that amazing quality and goodness.
Step 3: Separating the Meat (For Canning)
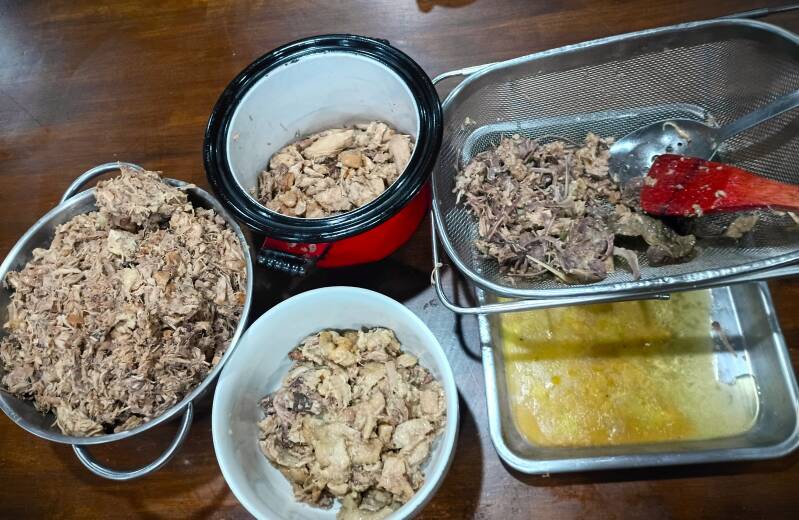
- Remove Meat: After the meat is fully cooked (2-4 hours), carefully remove the meaty sections from the pot using tongs. The bones should stay in the pot to continue simmering. I also put the meat in a strainer, over a pan to collect any goodness that drips out, so I can add it back to the pot. Or, in this case, will use later in my canning of the meat. I really try not to waste anything! I mean, why would I? Especially after spending so much time and energy processing!
- Shred/Dice Meat: Once cooled enough to handle, shred or dice the meat. Place the shredded meat into a large bowl. Set this aside for Part 3.
- Return Bones: If the meaty parts had bones, return the clean bones to the stockpot for the remainder of the simmer.
Part 2: Preparing the Chicken Skin Emulsion
This adds flavor and texture to your canned meat.
Step 4: Render the Skin & Fat
- Gather Skin: When separating the meat and bones, after straining, set the skin in a sperate bowl to use later.
- Or you can crisp up the skins separately and make them crispy.
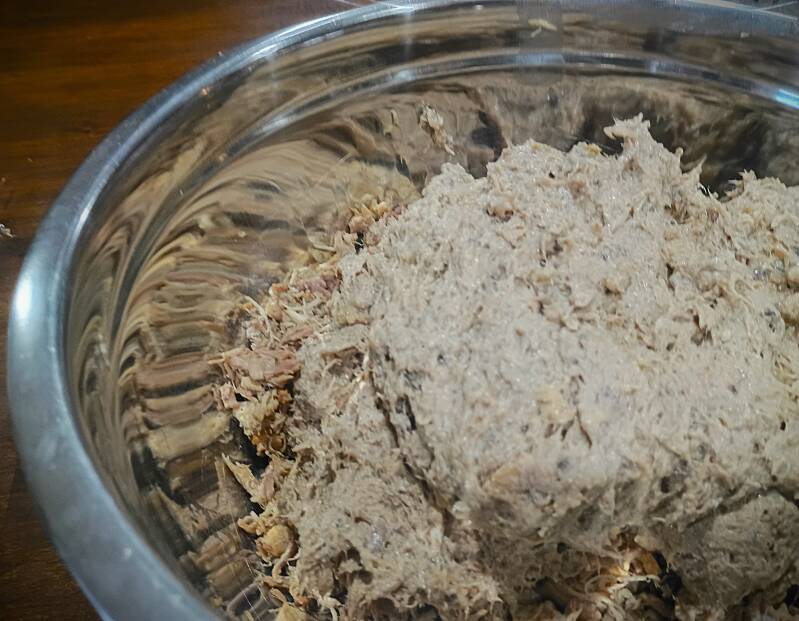
- Blend Skin: Place the skins in a small food processor or blender. Add a small amount of the saved oil from cooked skins or oil from the straining... and blend until it forms a thick, smooth paste or emulsion.
Step 5: Incorporate Skin into Meat
- Mix: Add the chicken skin emulsion to the bowl of shredded meat from Step 3.
- Season: Add any desired seasoning to the meat mixture (e.g., salt, pepper, poultry seasoning).
- Mix Thoroughly: Mix well to ensure the meat is coated with the skin emulsion for added flavor and moisture.
Part 3: Straining the Broth & Canning the Meat
This step requires a pressure canner for safe, shelf-stable preservation.
Step 6: Straining the Broth
- Strain: Once the broth has simmered for the full time, turn off the heat. Ladle the broth through a fine-mesh sieve . You can also line the strainer with a layer of cheesecloth or a coffee filter, if you don't want any debris at all. I usually don't mind.
- Defat: Let the broth cool for a few hours. The fat will rise to the top and solidify. You can skim off the solid fat (also called schmalz) and use later or discard. For me, I prefer to leave it in my broth jars as an added nutrition benefit for the colder months. If you do strain it out and save for later the remaining liquid is pure bone broth.
- Heat Broth for Canning: Bring the strained, defatted broth back to a simmer.
Step 7: Preparing Jars and Packing Meat
- Jar Prep: Wash and sterilize your canning jars (pint or quart). Keep them hot.
- Pack Meat: Loosely pack the prepared meat and skin mixture (from Step 5) into the hot jars, leaving a generous 1-inch headspace (the distance between the food and the jar rim). Do NOT pack the meat tightly.
- Add Broth: Ladle the hot simmering bone broth (from Step 6) over the packed meat, maintaining the 1-inch headspace.
- Debubble: Slide a plastic spatula or de-bubbler tool along the inside of the jar to release any trapped air bubbles.
- Wipe and Seal: Wipe the jar rims with a clean cloth dipped in white vinegar to remove any fat residue, which can interfere with the seal. Center the lids and screw on the rings fingertip-tight.
Step 8: Pressure Canning
- Safety Note: Meat must be processed in a pressure canner for safe, shelf-stable storage. A boiling water bath is NOT safe for meat.
- Load Canner: Place the jars onto the rack inside the pressure canner, ensuring they are not touching. Add the required amount of water (usually 2-3 inches, check your canner manual).
- Process: Secure the lid and process according to the pressure canner manufacturer’s instructions, using the required pressure and time for your jar size and altitude (consult the National Center for Home Food Preservation (NCHFP) guidelines).
- Typical Processing Time (at 0-1000 ft altitude):
- Pints: 75 minutes
- Quarts: 90 minutes
- Typical Processing Time (at 0-1000 ft altitude):
- Cool Down: Once the processing time is complete, turn off the heat and allow the pressure to drop naturally to zero. Do NOT open the vent prematurely.
- Final Cooling: Remove the jars and let them cool on a towel undisturbed for 12-24 hours. Check seals (lids should be concave). Store unsealed jars in the refrigerator.